
When I coached young people, it was always about the bigger picture. What good was it to have a State Championship Athlete if they went through life lacking positive values or beliefs that would benefit them, those around them or the world they live in.
 I never coached kids to win. I instead taught them the skills of success and helped them to grow as a positive person that honored and respected the sport, their competitors and the effort of those around them at every level. I wanted them to understand the bigger picture and become a positive light in this world. From there, trust me…winning takes care of itself on so many different levels.
As a coach, the first thing I learned was to never assume. You are here because you want to be a more successful hunter. Heck yeah! Totally what I want for you as well. But in doing that, I need to start right from the beginning with the bigger picture as well. I want you to go through the rest of this course carrying with you the underlying reasons, the heart and soul of what it truly means to be a successful hunter. To understand that you make a difference through your conversations, actions and teachings. See the bigger picture. Learn the skills of success and always include respect and honor as part of that skill set. From there, success will take care of itself.
On so many different levels.
So this is where we start. Understanding that each and every one of us as hunters have a responsibility to something bigger than ourselves. The responsibility to protect and insure that the hunting heritage that we enjoy today will be here in the years to come and for those that follow. For our children and our children’s children.
Whether we like it or not, the fact is that public opinion and perceptions of us as hunters will always have either a positive or detrimental effect on our opportunities as hunters. That’s why it is critical for us all to understand our role in the bigger picture and act in an ethical and responsible way.
Ethics are those unwritten rules that govern our behavior and set the tone for public opinion. Positive ethical behavior improves our public image as hunters and helps to insure a positive rapport with land owners and public land decision makers. Unethical behavior can do quite the opposite and quickly destroy years and years of positive work and relationships. That’s why it is critical and a responsibility for all of us as hunters to pass on and teach the importance of ethics to others.
 An important thing to remember though, is that ethical behavior in relation to hunting, can often be a relative term effected by many personal, cultural, moral and traditional practices. It can quickly become a slippery slope causing a divide and destructive dissension between the different regional hunting styles and practices within the hunting community. This is something we all need to be aware of and to be careful not to fall into that negative trap of dividing ourselves and allowing any level of loss of our hunting heritage. We each need to understand that because a certain style or method is not our cup of tea, that does not make it unethical or wrong. Please understand that concept and defend it.
With that said, as your Coach for this course I want to relate a somewhat common core sense of ethics; a code of behavior, responsibilities and respect as perceived by most elk hunters of the Western States.
If you were to ask a local cowboy what hunting ethics were, the answer would be quick and simple; “Mind your manners, do what’s right, honor the critter, the land and other folks that use it”. Pretty good explanation. So let’s take a look at that:
MIND YOUR MANNERS –
Show respect & be courteous to others. Treat them the way you want to be treated.
Do not trespass, litter or purposely be destructive or disruptive to the hunt of others.
Honor any wishes or regulations of the area or landowners. Be a good steward.
DO WHAT’S RIGHT –
If you are doing something that does not feel right to you, then it most likely isn’t.
Know and follow the laws & regulations of your state.
Think Safety FIRST in all aspects of your hunt. For yourself and those around you.
Know, Understand and be proficient with your weapon.
HONOR THE CRITTER –
Only use a weapon that meets or excels the requirements needed for the animal hunted.
Know and understand the anatomy and placement for a lethal shot.
Only take shots within your ability level with the purpose of a quick and clean kill.
Follow up on every shot. Know that you had either a clean miss or a hit.
Make every effort to quickly find and finish or recover a hit animal.
Do not shoot an animal if you are not able to pack it out in time to prevent spoilage or waste.
Care for meat properly to minimize waste and bring out as much meat as you can. The standard expectation is 4 quarters, back straps and neck meat.
Do not leave the carcass or gut pile near a road or within the public view.
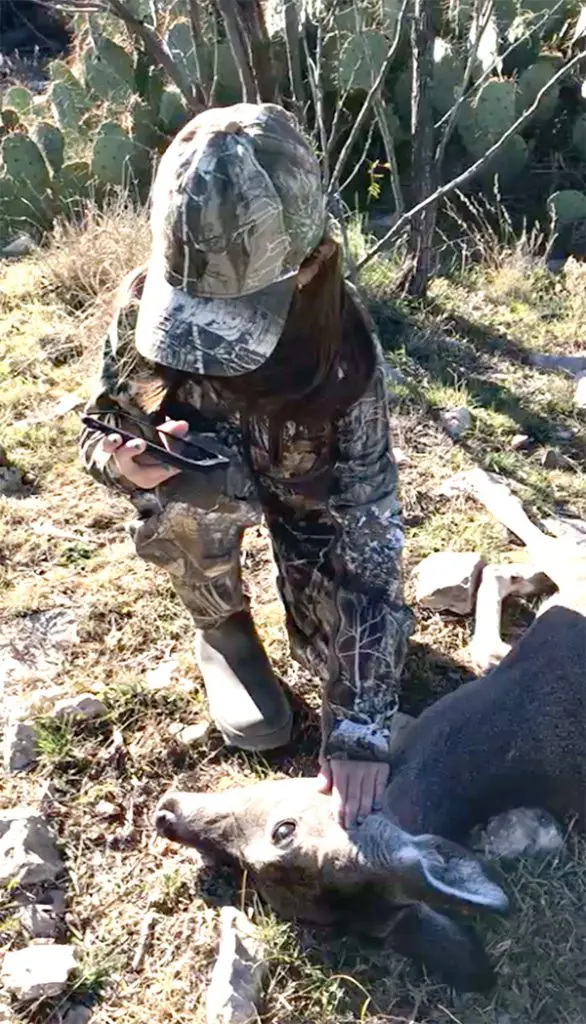
Try to show respect to the animal in your photos. Shots that are done in poor taste or covered in blood just give fuel to non-hunting movements.
Transport the animal without displays that dishonor the animal or the hunting community.
HONOR THE LAND –
Leave the land the way you found it.
Whether on Public or Private land, treat it better than if it was your own.
When having to defecate in the field, cover or bury your remains. Leave no trace.
Never leave fires unattended and always insure that they are completely extinguished.
Whether you are in camp, out in the field or leaving the area, take out more trash than you bring in.
Insure your camp does not pollute and when departing, leave no trace behind. All latrines are completely covered and left natural looking.
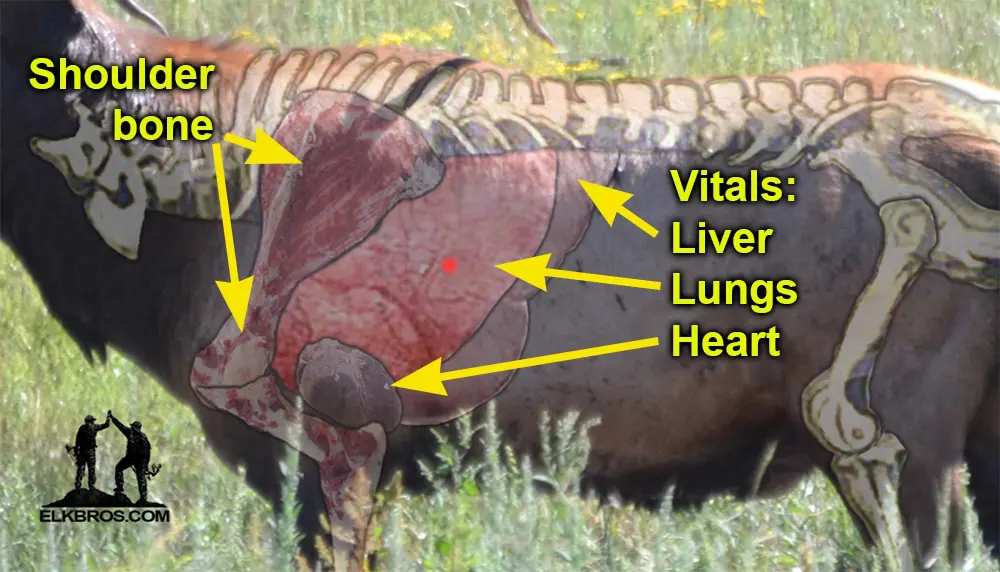 Elk are a large and powerful animal with a thick hide and thick bones that can keep an arrow from penetrating properly or even at all. I have witnessed time and again, hunters hitting the shoulder bone with an arrow and only getting an inch of penetration. I have also skinned out animals that have had old rifle bullets or broadheads lodged in the spine as well as muzzle loader slugs just under the skin in several locations. This is one tough critter.
No one wants to see an elk run off with a bullet or broadhead lodged in the spine or with a flesh wound. Those situations are hard enough, but at least they survive to fight another day. What’s way worse is a poorly placed, angled or weak penetrating shot that misses the vitals and still wounds the animal. A poorly placed shot can make it basically impossible to track and recover, leaving little to no blood. A hunter’s nightmare. A wounded elk hit in their internal organs will eventually go down. But it may be weeks before the animal dies from a poorly placed shot. This my friends is what we train and train hard to avoid. Step one in that training? Know an elk’s anatomy!
Understanding an elks anatomy will make a huge difference in knowing correct shot placement. A shot that pierces the vitals and promotes a quick and clean kill is exactly what we want. When I coach rifle hunters and Archery hunters, just because of the nature of the different weapons, there is a difference on shot expectations and the capabilities of each. A rifle hunter has distance, accuracy and knock down power to their advantage. However, the distance and nature of the weapon will make it difficult to find a blood trail. That’s why a rifle hunter’s job is to put the animal down where it stands. This can be done from multiple angles and repeated shots if necessary.
As both an archery elk guide and a bowhunter, I will take a double lung shot over a heart shot any day. Is the heart shot lethal? Absolutely, however I will talk about this more in the segments below. A liver shot is also lethal. But, it can take anywhere from 4 to 8 hours for an elk to die from a liver shot, depending on the severity of the hit. Anytime you increase the amount of time it takes for the animal to die, you proportionately increase the chance of jumping the animal out of it’s bed. Now the fear and adrenaline are pumping and what would have been an easy recovery just went south real fast. Because it was lying down, the wound can now be covered with dirt and clot up. If that happens, you are in for a LONG day or night. Do yourself a favor, be patient. Be disciplined and go for that pass through shot that I am going to show you in just a minute.
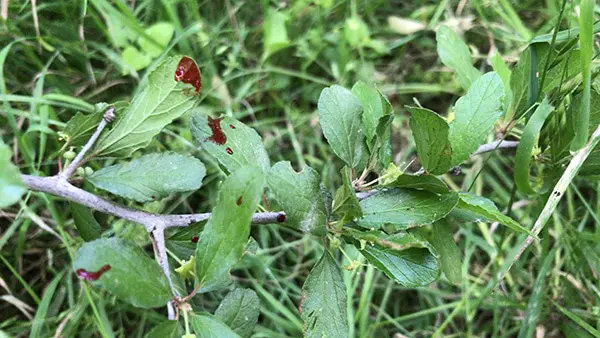 One other point before we move on. Understanding anatomy is also critical to helping you determine what decisions to make after the shot as well. You should know by the placement, sound, and blood sign just what type of hit you made. It helps you to know if you need to wait a half hour, two to four hours, six to 10 hours or if you need to totally back out and come back in the morning.
I have seen two different scenarios on a liver shot bull during the 2019 season. In the first case, after the typical half hour after a bull was shot, a hunter that thought he hit a bull in the lungs began his tracking job and jumped the bull only to have him run off. Had he realized that the angle of the shot could have only resulted in hitting one lung and the animal’s liver, he would have waited at least 4 hours and he would have found the bull lying only 150 yards from the point of impact.
In the second scenario, the hunter realized from the shot placement, angle and the dark blood trail that he had indeed hit liver. Without taking a single step forward from that point, he and his buddy backed out and went back to camp. After a five hour wait, they returned using their BaseMap GPS Waypoint to the exact last spot. After topping a small rise following the blood trail, the bull was lying dead only 60 yards away! Riga-mortise had barely begun to set in. Had they not backed out before, they would have jumped the bull for sure and their ending could have been WAY different.
Okay y’all, with that said, let’s get after it. We’re burning daylight!
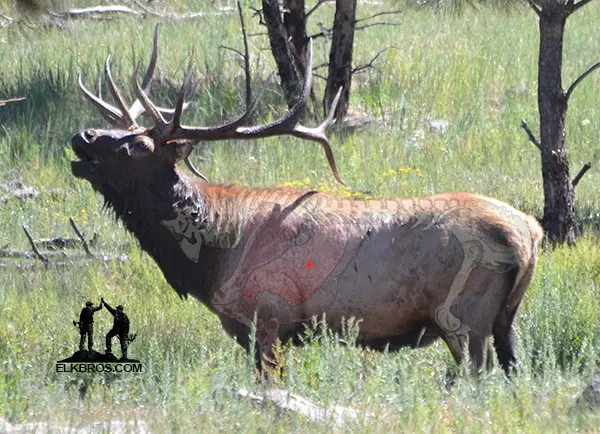 The NUMBER ONE GOAL in our Training Camp is TWO HOLES, a total pass through on your shot to help insure you can recover your elk. Understand, this is the “goal”, and in a perfect world we would shoot it every time. But you and I both know that there are going to be variables; angles, elevation, etc. that will need to be taken into consideration. No matter the angle, you need to understand your shot, the anatomy and shoot for a double lung in order to give yourself the best opportunity for recovery. It is critical, in any scenario, for you to have a good blood trail. That is the exact reason I teach my hunters to aim on a specific spot and shoot a heavy arrow with solid energy. If you do that, you will get a pass through and a blood trail that helps your tracking job immensely.
The spot we always aim for is mid-body about 3 to 4 inches back from the crease. That line coming up from the elbow. If you aim for that spot, even if you shoot slightly off to the right, left, up or down …you are still golden and will almost always get a pass through.
If you don’t get a pass through, you WILL still get both lungs. Once you double lung a bull, he is going down in a hundred yards…especially if you bugle after your shot to calm it down. When you pierce both lungs, you have just let the air out of the balloon. It IS a dead elk.
Make that shot, be diligent and stay put. Leave the animal alone for 30 minutes to an hour, and you will be doing the happy dance.
When it comes to shot placement on elk, remember that our emphasis as your coaches is to insure a solid, responsible and ethical shot. There are very lethal shot locations that can be made by someone that totally understands an elk’s anatomy and taken within a hunter’s effective and solid killing range. Those particular shots, if made correctly, are extremely lethal. We have nothing against someone choosing to take those shots even if they are not our recommendation for reasons stated below. Every one of us have to make the ultimate decision when it comes to our comfort zone and confidence in our shot selection. With that said, we will briefly discuss those shots and then we will give you our shot recommendation and the reasons behind it.
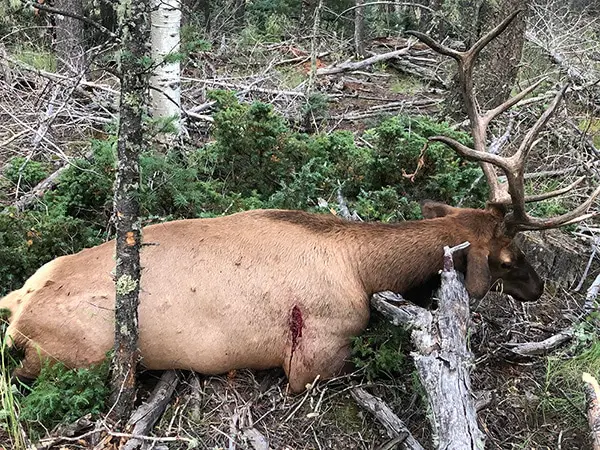
Double Lung
As I said in the shot placement section above, my number one goal, as is yours in this training, is TWO HOLES to insure I recover my bull. So I always shoot for a double lung. And by shooting mid body, about 4 inches back from the crease, that line coming up from the elbow, you have plenty of room in each direction. This shot is devastating and the elk is going to go down quickly, which is exactly what we all want. This is our NUMBER ONE SHOT RECOMMENDATION.
The Frontal
The frontal shot, when made, is a devastating shot. Animals shot here, generally will go down in minutes, if not seconds. Elk have a natural dark line usually coming up from their chest that gives you the center line if they are directly frontal. If there is a slight quartering to one side or the other, you would adjust slightly left or right, depending on the amount of the slight quartering.
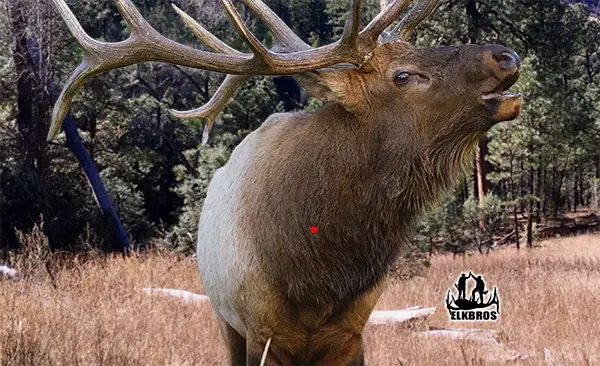
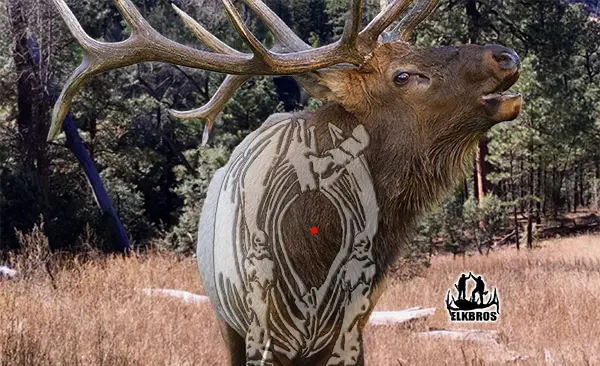 The shot location is center, side to side making adjustment for any slight quarter and midway between the top of the shoulders to the bottom of the chest. It is imperative that a hunter that shoots this shot has a complete grasp of an elk’s anatomy as well as great shooting skill. This shot should only be taken by those that know what they are doing and I highly recommend that the shot not be taken over twenty yards. This is not a shot we recommend. If not made correctly, it guarantees a wounded animal and no recovery.
The Golden Triangle
If you look at the anatomy of a bull elk, the “golden triangle” that I am talking about is just that, golden if you ace it. A shot here on a broadside animal can be anything from a direct heart shot, to hitting the top of the heart to a double lung hit even with the shot being a little high. So again, I can’t say not to shoot there. Deadly shot, If made.
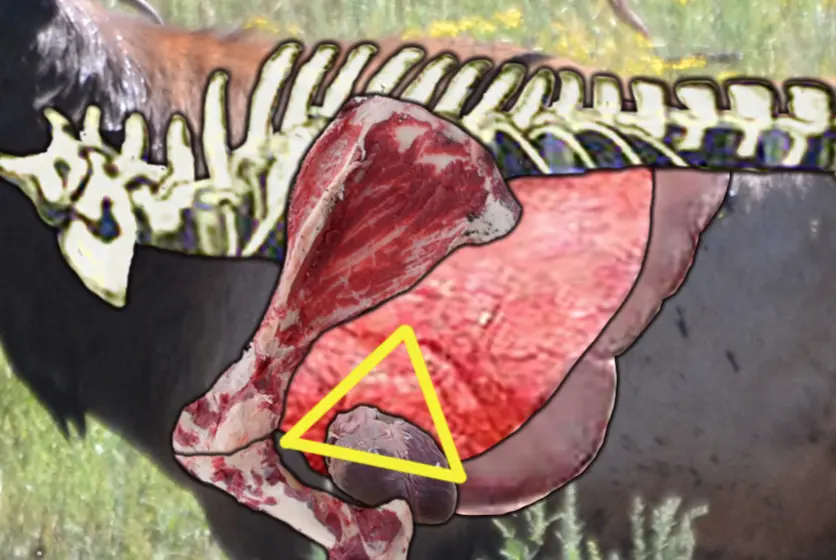 With that said, I have seen a ton of shots attempted there that have gone bad and give me three things to worry about as a guide: ( I always feel if it’s not me shooting, I am not in total control, so the variables of what can happen grow)
- Too low one way and hit the leg, or too far to the side and catch the shoulder bone, or too low another way and get brisket. Two sides of that triangle are risky. If you hit any of those areas as described, you are not going to recover.
2. If the shot is a bit off, missing the heart and ends up in the crease, it usually is not a pass through and when the bull runs, he shears the arrow shaft and the skin covers the entry wound and he bleeds internally. Hard tracking job, with the possibility of losing the blood trail. The animal is going to die, but you risk not recovering the animal.
3. If the bull is quartering away and you shoot that spot, and the heart is missed….that means you only get one lung. Again, an elk is an extremely large and strong animal. It can survive for a long time and go a long way on one lung. It “most likely” will die, however you are not going to recover that bull for about 4 to 6 weeks.
Quartering Away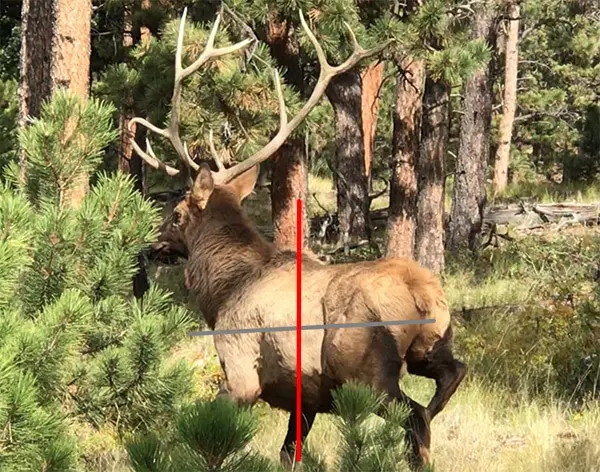
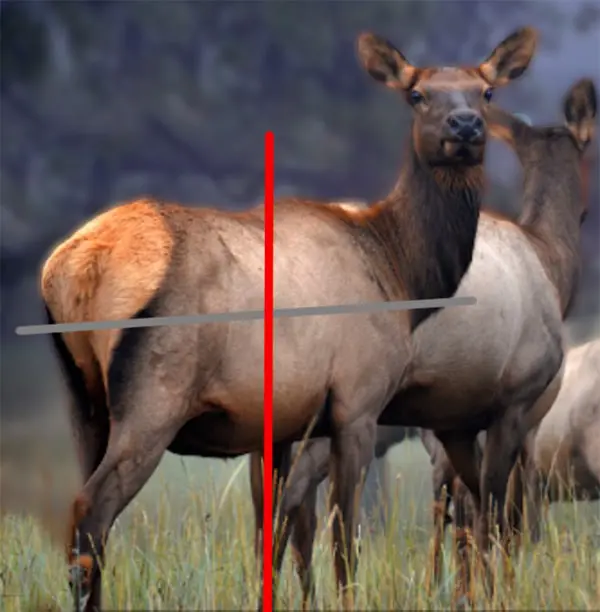 I also always remind hunters to look at the legs to be able to tell how much the animal is quartering or if he is solid broadside. We don’t shoot an animal quartering to us with Archery equipment. And for a quartering away shot, ALWAYS aim for the leg on the opposite side as shown in the pics.
If you were to aim for the normal “pocket” behind the shoulder on an elk that is quartering away, you are risking missing the lung all together or only getting one lung. Though elk have been known to survive with only one lung, it is most likely going to be lethal and take several weeks to succumb.
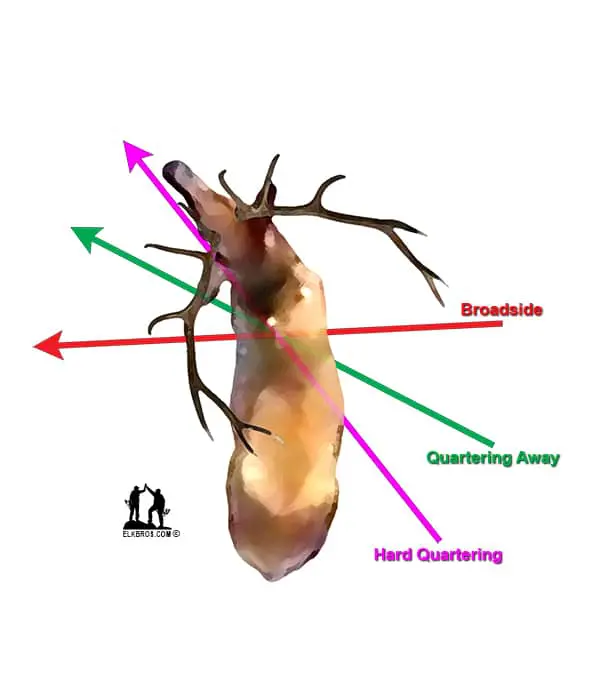 Each and every one of us has to to determine just what the most effective range and shot placement is, that we are most comfortable with as ethical and responsible hunters. That determination can change from year to year based on better or declining proficiency. So we all need to constantly look inside ourselves and make a decision that we will be able to live with.
The diagram to the left shows our preferred shot selection, with the first being the broadside shot with a pass through. The quartering away shot will also insure a double lung hit, but not necessarily a pass through. I have had pass throughs with all three shots, but the broadside shot, with a small quartering in either direction, is definitely the shot of least resistance when it comes to getting two holes.
We would however like to continually drive home the fact that your goal should always be two holes, a pass through, double lung hit. Not only insuring a quick death, but also a solid blood trail to help you to recover the animal.
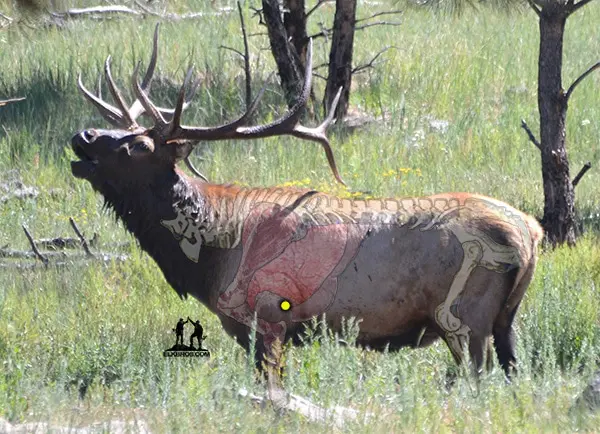 For the rifle hunter, things change just because of the natural differences in going from a hemorrhaging weapon (Arrow & Broadhead) to a long distance weapon that uses blunt force and a high energy impact with knock down power (Bullet) . Things change drastically from the bow to the rifle as far as shot choices because of the devastating power, distance, trajectory and accuracy of the bullet.
As a rifle hunter, your goal when it comes to shot placement is to do as much internal damage to the vitals as possible for a quick & clean kill. We coach our hunters to aim for the lower third, preferably where a heart shot is located, especially on a broadside and slightly quartering shot. By aiming for the lower third heart shot you have the following benefits:
– If you shoot low; clean miss or non-lethal flesh wound. Most desirable outcome without a clean kill.
– Shoot slightly high; vital lung shot.
– Shoot slightly left or right; lung liver or lung
Once the first shot is off, you are to keep the animal in your sights, chamber the next round and if the animal does not look to be going down, locate and shoot another killing shot. Chamber another round. Repeat if necessary. Do NOT let a hit animal walk off. The distance and nature of the weapon can make it very hard to find a blood trail. You want to put the animal down where it stands.
If the animal drops instantly, be ready and very careful on your approach. An animal that drops instantaneously could most likely be “spined” and either temporally or permanently paralyzed. When approaching the animal check the chest for movement, the ears if they are upright or eyes that are closed and not open and glazed. These are a sign of an animal that is still alive. Dispatch the animal.
Think Safety FIRST
A bullet is a devastating object that can and will travel extreme distances to a target and beyond if there is not a backdrop there to stop it. You must ALWAYS be aware of that backdrop. Just like when they are about to launch a rocket into space, for you there is always a “Go – No Go” decision to be made in every shot situation before you ever even put your finger on the trigger. Your shot process will always be to first determine if the animals location is clear of any other animal in front or behind it and that you are certain of your backdrop. Never shoot at an animal that is sky-lined or where a bullet can travel beyond your line of sight. If there is ANY chance of a stray bullet, then that is not the shot you want nor take. Wait for a better opportunity or reposition.
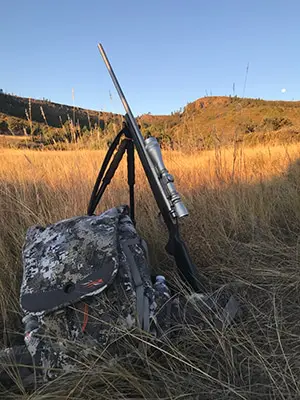
Your SHOT PROCESS needs to be consistent, methodical and safe:
– Load shell in chamber, maintain muzzle control and awareness.
– Determine shot location, safe backdrop. No other animals behind or in front.
– Do you know the distance? Range it if not. Be sure.
– Locate animal in sights or scope
– Check line of sight again to be clear. No other animals.
– All clear
– Safety off
– Finger on trigger
– Breath in slowly, and hold
– Squeeze, like shaking a hand…let the gun surprise you.
– Get the animal back in the sights while racking another shell.
– Determine situation; Hit, Miss, Kill… shoot again if needed and repeat process.
NOTE: Binos are great for vantage point glassing but if you spot an animal in your known shot distance during a hunt, always do any studying of it through your scope. Don’t waste time or movement going for binos and then have to put the binos away and relocate the animal. The animal could easily move or walk off and cost you an opportunity. Best case scenario: If you have a buddy with you, have him range the animal while you study the situation through your scope. No time wasted, no relocating and you are ready for a “Go – No Go” decision.
Thoughts and Considerations: Angles and Elevation
When rifle hunting elk at a distance, it’s important to remember that very seldom are you going to be on the same level when taking a shot. This is not the rifle range with all things even or at least consistent every time you shoot. There is almost always going to be an angle or multiple angles of some kind occurring. Angles can be tricky, but if you think about where you are in relation to the animal, you can make an adjustment up and down, right or left that will be on the money.
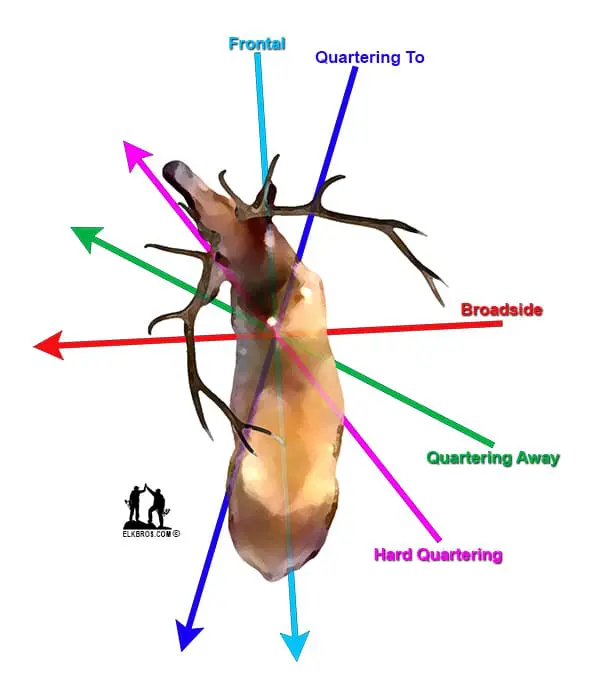 Depending on the degree of angle, let’s say you are above the animal and you are shooting lower third, aiming as if you are level and broadside. At that angle you may only get one part of a lung or end up with all brisket, a non vital shot that will send the elk on a full run. But if you bring your shot up, more mid body or higher (again how much depending on the angle) then you are going to have a lethal hit. If you are below the bull, then the lower third shot will still be good. A quartering to or quartering away shot also creates different angles. We will talk more about those shots below.
When shooting at an animal quartering away, you want to line up with the front leg on the opposite side. This will give you maximum effectiveness. If the animal is quartering away hard to where you can only see most of the back end, this is a “No-Go” situation until you have a better angle. We DO NOT shoot at elk from the back end.
I am personally not a fan of shooting an elk when they are quartering towards you, but I think this has a lot to do with my archery mindset. A rifle shot placed in the right spot, as shown in the diagram on the left, just in front of the shoulder is a devastating shot with a rifle and will have quick results. The key is knowing the anatomy, knowing your capabilities and having the confidence to make the shot. If that is the case, you are golden.
Thoughts and Considerations: Meat quality or possible loss
One shot that a lot of hunters utilize is to shoot an elk in the shoulder with the idea of hitting the lungs while also hitting the animal in the shoulder/front leg bone to disable the elk from being able to run. But blowing out the shoulder also destroys meat in one if not both shoulders, so I’m not a fan. When I consider a shot, I also look to see where the bullet will travel. I want to shoot a shot that spares the quarters, if possible, to insure maximum meat harvest. An important consideration if you are wanting to harvest as much meat as possible which is my goal.
However, remember there are two goals at work here though; 1) to put the animal down as quick and humanely as possible and 2) To harvest and recover as much meat as possible. If it comes down to a situation where you have to send another or even multiple rounds into the vitals to finish, to insure a quick death…then that takes first precedence. We will then work hard to recover every bit of meat we can and deal with whatever that situation brings.
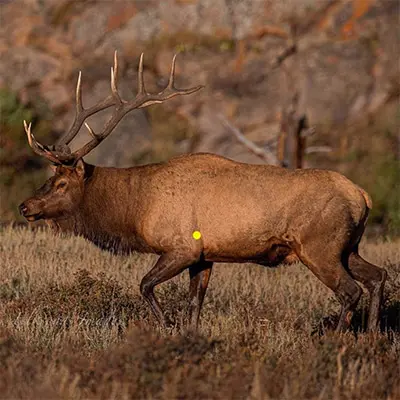 Heart Shot / Double Lung
The heart is located on the lower third of an elk, just above the elbow to the pocket just behind the elbow depending on the angle. A shot here on a broadside animal can be anything from a direct heart shot, to hitting the top of the heart to a double lung hit even with the shot being a little high. This is the shot I prefer for a quick kill that gives maximum meat harvest. When hit in the heart, you will see an elk generally “hump up” (Nose goes down and the back goes up, like someone hit it hard in the stomach) showing they have been hit hard. Always rack another shell and be ready for a follow-up shot. The bull will most likely go down in a few seconds or steps. If you see the legs starting to give, the animal put its head down and cough, it is going to go down. Even after an animal goes down, keep your scope on it for 10 to 15 seconds to make sure it doesn’t get back up. Now you are golden!
The Frontal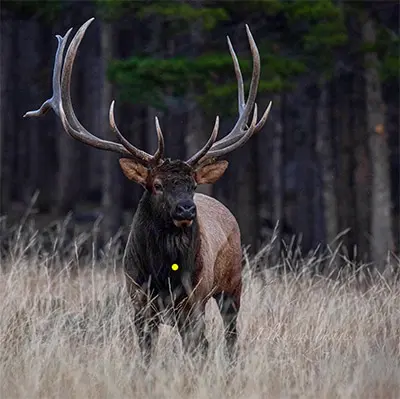 The frontal shot with a rifle is a devastating shot and will put an animal down fast. Aim midway between the belly and the back, center mass. If there is a slight quartering to one side or the other, you would adjust slightly left or right. I do not recommend a frontal on an elk quartering hard to one side or the other. Yes, the shot can be made and be very effective if shot by someone that really knows the anatomy well. But even with my knowledge and skillset, I would rather wait for a better shot than shoot an elk quartering hard at me. If you look at an elk through your scope and it is facing you and you cannot see, or barely see any of the side of the animal, it is directly frontal or in a very slight quarter. That is a shot I would take.
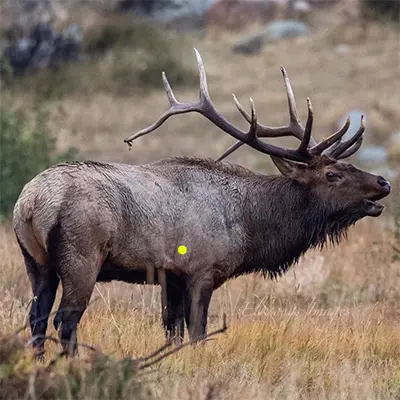 Quartering Away
The quartering away shot is a favorite and will produce a quick clean kill shot. When shooting an elk quartering away, you are still aiming at the lower third but it’s the opposite leg that is your guide. Find the leg on the other side, slide your crosshairs up to that lower third, breath and squeeze.
The more extreme the animal is quartering, the more extreme the angle. In some cases with a hard quartering animal, you will be aiming for the leg on the other side, with your crosshairs back more towards the onside hip. If the quarter is so extreme that there is a chance of hitting the animal in the back hind quarter, do not take that shot. That is a marginal shot risking wounding the animal. Show discipline and patience and wait for a better shot.
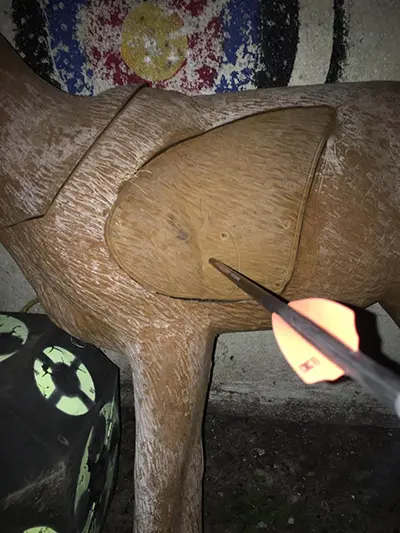 Shooting within yourself is about being honest and true to yourself. Fully understanding your capabilities and staying within your limits as it pertains to your shooting confidence, comfort zone, effective range as well as your equipment’s abilities in relation to the effectiveness of your equipment to provide a lethal and quick kill of the animal you are hunting. The bigger and stronger the animal, like an elk, the smaller your margin for error becomes. I personally know a lot of whitetail hunters that can aim for a shoulder and blow right through a whitetail. Ladies and gentlemen, that WILL not be the case with an elk. It is imperative as an ethical hunter to stay within your realm of confidence, effectiveness and ability level. Know your limits. Stick to them and put yourself in the best position to finish. If you do that, you save yourself from a lot of regret and help to put our image as hunters in a better light with those watching from the outside in.
When it comes to your Comfort Zone, your situational confidence to pull back your arrow or click off that safety and then release or take your shot, it is my job as your coach to help you understand it, define it and embrace it.
It’s important to understand that your Comfort Zone can both be dynamic, changing from time to time because of your elevated skill sets, or it could be your choice to determine and define your Comfort Zone based on your personal beliefs or principles. In other words, you might be someone that can effectively and confidently shoot up to 60 yards, but you have determined that you will only shoot an animal that is within a set distance. This is your own determination and belief system.
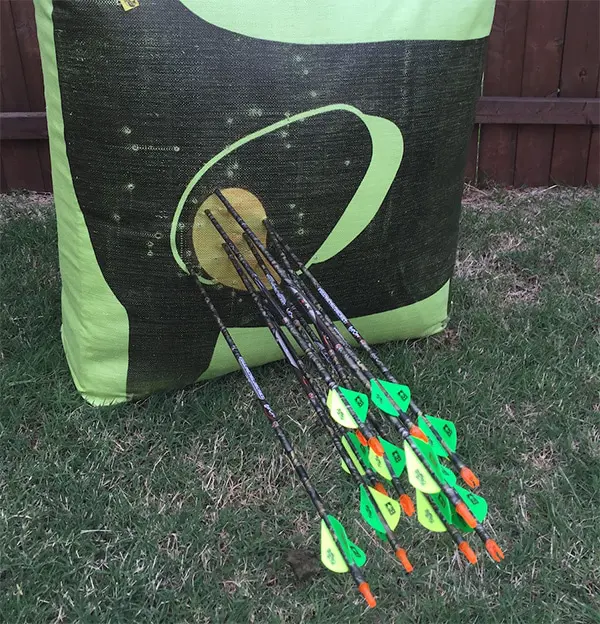 Our Comfort Zone is all about practice and developing shooting confidence. Practice creates our Comfort Zone and defines it for us. You are the same as any athlete preparing for an event. How well you perform will always fall back on your preparation. When it comes to your shooting confidence, EVERYTHING points to practice. Everything good and everything bad.
It’s also important to understand that we do not determine your Comfort Zone or Effective Range. That is solely your call. ONLY YOU CAN KNOW YOUR COMFORT ZONE. But how will you know it? Well, here you go: Whatever distance you are at that you have any doubt that you can make the shot, you are beyond your comfort zone. That does not mean that you are always going to ace every shot within your comfort zone. But you dang sure believe you will.
“Effective Range” is a combination of both your shooting Comfort Zone and the ability level, the Power & Energy & Ability of your equipment to penetrate and achieve our goal of TWO HOLES. One does not always equate with the other. You might have the range but not the power or penetration. So it is not only important for you to know your “Comfort Zone” when it comes to YOUR abilities to deliver a killing shot, but it is just as important to know and understand your EQUIPMENT’S abilities or inabilities to perform, penetrate and pass through at those distances. That will define your effective range.
Shooting confidence comes from not having any doubts in your thought process with the most important factors involved;
– Knowing the best shot placement to put an animal down as quick and as clean as possible.
– Knowing your weapon and how it performs in various conditions.
– Knowing how to judge or range the correct distance
I am an instinctive shooter and have been shooting since I was 6. But even to this day, if I start thinking, focusing on my arrow point instead of my spot, my shots can be all over the place. Now, instinctive and pins are different, but still the same in so many ways. Shoot, shoot, shoot, work form but once your bow is on, once you get solid…focus on the spot….see only the spot…look beyond the bow. The bow is an extension of you. Breath, hold (the breath), release. The target, the point of contact is the focus. Not the bow. The best way to try to explain it is when you decide on the yardage and focus on the spot, the needed pin will follow your focus. Your instincts will take over. The release will happen.
Also, give yourself a break. Not every shot is an ace. Not every shot that is off means something is wrong somewhere. Let it go. It’s in the past. Look at your point of desired impact. Draw, breath, hold, release. But what if you have to hold for a long time? Stay focused…on the point and don’t transfer your thoughts to the bow. Your brain will know and will feel when it’s right. Release.
Here are some tips to help you towards your goal of Shooting Confidence:
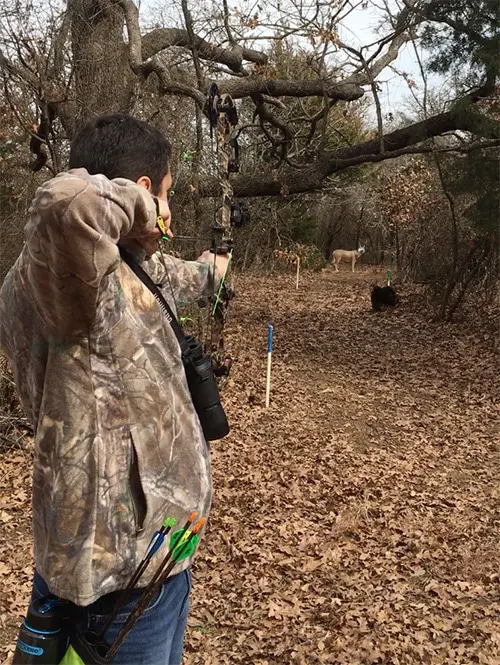
– If you haven’t shot for a while, practicing shooting is more important than nailing every shot. The idea is to remember early on you are strengthening.
– Be sure to include shoulder strengthening exercises in your weekly training.
– Be sure to warm up and stretch the shoulder before shooting. This can be done using your bow as a stretching aide.
– Work from a Paper plate sized target to a Dessert Plate to Coaster sized diameter with a black quarter sized dot inside each..shoot small, miss small.
– Start with a goal of 3 out of 5. Then, when mastered, go to 4 out of 5. Then to 5 out of 5.
– Vary shooting positions: Standing, kneeling, sitting in a chair.
– Shoot with hunting clothes on – With people watching – In wind (of all directions), in cold, heat and drizzling weather
– Do quick Sprints, shoot when out of breath
– Shoot with the sun in your face – shooting with/through obstacles – One arrow at unknown distances
– Play games like “Horse” with a partner
– Do field walks using a judo point and challenge each other picking targets; flowers, cow patties, short bush branch, etc.
– Shoot 3D Competitions – Hunt Small game.
– Shoot 30, 20 & 10 yards further than your comfort zone.
FOR MORE SHOOTING TRAINING AND SHOOTING DRILLS, CLICK ON THE BUTTON BELOW:
When you release an arrow at an animal, there are three possible outcomes; a lethal hit, a miss, or what no-one wants…a wounded animal. Before you release an arrow, you must be absolutely confident that the animal is at the best angle, effective distance and desired shot position for you to make a lethal and quick kill. A shot should never be “forced” because you are worried that you might lose out on an opportunity. Understand that regret is worse than any missed opportunity. If you have any doubt, either make an aggressive move for a better shot, wait for a better opportunity or let the animal walk.
Your goal for your first shot should NEVER be to just get an arrow into an animal. That would be totally irresponsible and unethical. However, once you have shot an animal and another shot opportunity offers itself, you need to try to put another arrow in the animal. Even if the shot distance or angle is one you would never even consider as your first shot. Do what it takes to put the animal down as quick as possible.
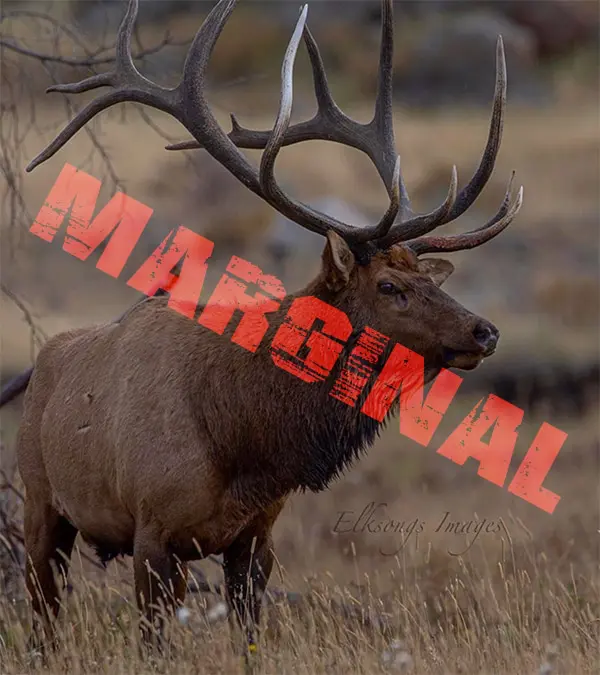
With archery equipment, there are shot angles that we believe are immediately and totally marginal. If you have an animal standing in a “Frontal” or “Quartering to” position you absolutely have a MARGINAL shot situation. But if that very same animal is in your “RED ZONE”, your confident killing range, and seems hung and hesitant to come any further, that is actually an animal you can kill with patience and knowledge. An elk that is in that position and hesitant to come further will at some point turn to go back the way it came. The biggest mistake it could make. Once the elk turns broadside to retreat, draw and scream a bugle at the same time. The bull will freeze broadside looking at you. Game over!
There are also shots or angles that may be considered good shots when taken on an animal that is completely unaware. But those very same shots can quickly become a marginal shot on an animal that is alert to something wrong and becoming nervous. Take the quartering away shot for example. That shot on an unaware or feeding animal is a very good shot if not quartering too hard. But if that elk is now looking nervously back at you, any sound or movement could cause the animal to bolt. Now a quartering away shot, with the animal turning to get away, can become an arrow in the back hindquarter. Not what you want to happen.
It is important to consider three aspects that can make a normally solid shot into a marginal one. If any TWO OF THESE THREE things combine, the red flag should go up and you should absolutely consider not taking the shot:
– A Quartering Away shot (with the bow, we never recommend taking a quartering to shot)
– Alert Animal showing nervous body language
– The further the distance past 40 yards, the more possibility of a good shot becoming marginal.
One of the biggest mistakes made by inexperienced elk hunters is not moving themselves into position to get the best shot opportunity at a bull coming into their location or setup. Many times I have seen hunters freeze up behind trees or brush, or even worse, set themselves up behind trees or brush therefore limiting or eliminating shooting lanes and their chance at killing a bull. The usual reason for not moving is because they don’t want to blow the situation or spook the bull.
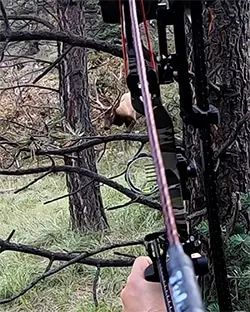
This is where I like to do the math.
Situation 1: Let’s say you have a bull coming in, but you are behind obstructions that will not give you a clear shot. The bull doesn’t see you when it walks by, it doesn’t get spooked but it just keeps on going. The situation equals a blown opportunity. The thinking here is that if you let the bull walk by without spooking it, you might be able to then call him in again or move in on him after he goes by. You can forget that. It won’t happen. If it does, go buy a lottery ticket. Generally when a bull comes in, he didn’t booger because you had the wind in your favor. Once he gets passed you, at some point he is going to get a snoot full. When that happens, he has been educated to the situation. He knows exactly where you were and he is gone. Result…blown opportunity.
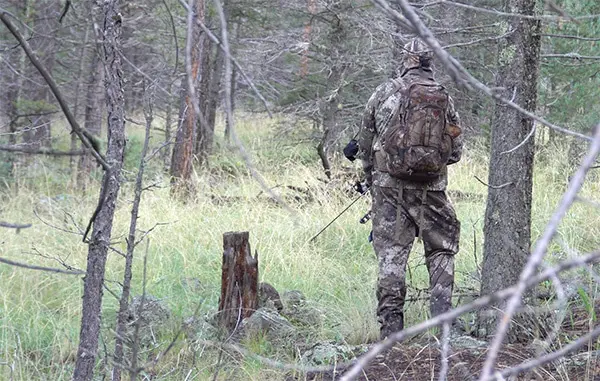
Situation 2: Instead of freezing up, when you hear the bull coming you scan for the closest spot that gets you IN FRONT of trees or brush to break up your silhouette and you move there. If the bull is where he may see you, you try to get there silently, when he is moving. It is harder for a bull to pick up sound or movement when he is moving himself because everything is moving around him and he is making noise as well. If you are obstructed from the bull’s view, don’ t worry about noise. He already thinks you are an elk and the noise just confirms it. So now you have two things that can happen in this situation. Either the bull gets spooked and runs off, which is the same result as the 1st situation. OR, now he comes in and you can get a shot and kill the bull. MUCH BETTER ODDS THAN FREEZING UP. You have to give yourself an opportunity. Be aggressive. Make the move!
Another situation is when a bull is in an area where he can be stalked, ambushed or walked up to and shot. Yes, walked up to! If you have a bull in front of you raking a tree and you need get closer for an effective and ethical shot, then do it. When his attention is on that tree, walk right up to where you can shoot him. Be aggressive.
If it is a windy day and you have a bull feeding in the trees, get something between you and him and MOVE! He can’t hear you. That sense is taken away. He can’t see you while his head is down and he most definitely isn’t smelling you if you have the wind right. It is a perfect situation to be aggressive and create a situation. Make your opportunity! If he is within shooting range and he looks up and starts to booger, draw while screaming a bugle and stay focused on that kill spot. One of three things will happen with the last two being the most likely; 1) he runs off 2) He runs for about 10 to 20 yards, stops and turns back broadside just one more time to see what the heck is there, or 3) He freezes and looks at you. If the last two happen, you are in the money. THAT, is a dead bull.
To clarify two points:
1. Always set up in front of trees and tall brush to give yourself the best shooting lanes. The backdrop will break up your silhouette.
2. Whenever there comes the choice between losing an opportunity or creating one, take the latter. BE AGGRESSIVE. The math doesn’t lie.
There are a couple of different meanings when we talk about Shooting position. One would be where you set yourself up in relation to the brush and trees around you and the approaching animal. Let’s call that “The Placement”. The other would be how you position your body for the most efficient and effective shot opportunity. Let’s call that “The Plant”.
“The Placement” – I am going to come out of the chute right away here, hard and strong. NEVER, I repeat, never ever place yourself behind objects, trees or brush, to “hide” yourself from the incoming elk! NEVER! If you do, you have just added elements to the situation to limit your shooting lanes and shot opportunities. You are introducing “Failure Points” and my goal as your coach is to always work to teach you to identify and eliminate failure points. Instead, you are going to set up in front of trees and brush that become a backdrop and break up your outline. Place yourself in a way that provides the clearest line of trajectory, angles and clear shooting lanes. Having low brush or objects in front of you that will not interfere with your shooting lanes is fine, in fact some foreground, low cover also helps to break you up, but it is not a necessity.
It’s an elk’s natural instinct to expect a predator to hide behind objects, so they are always scanning for movement behind trees, rocks, brush, etc. But when you set up in front of objects, it’s a whole different ball game. I have many times experienced the elk trying to look past me or around me.
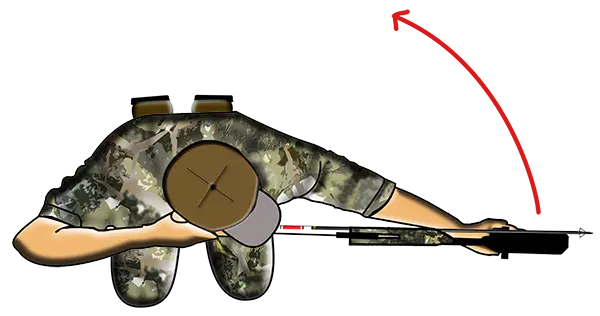 “The Plant” – Just as with any other athlete in any sport, proper footwork, your stance or how you have your body turned in relation to an approaching elk, is critical to give yourself the largest range of shooting lanes while being able to draw with proper form and the correct line. Think about how your feet are placed when shooting your target at home. Basically, your right and left legs in direct line with the target and feet somewhat pointed at a 90 degree angle (depending if you have a square, open or closed type of stance). The same position needs to happen in the field but when you are dealing with a dynamic situation, where an elk can change positions or directions. Remember that it will be easier for you, if you shoot right handed for example, to rotate your upper body to the left and still be in solid shooting form. It is much harder to rotate the upper body to the right. Your bow arm will go over or just past your left leg or left knee kneeling. Anything past that can be difficult without breaking form. So make sure you turn your body in a way that you have the most area coverage to the left in case you do have to rotate for the shot.
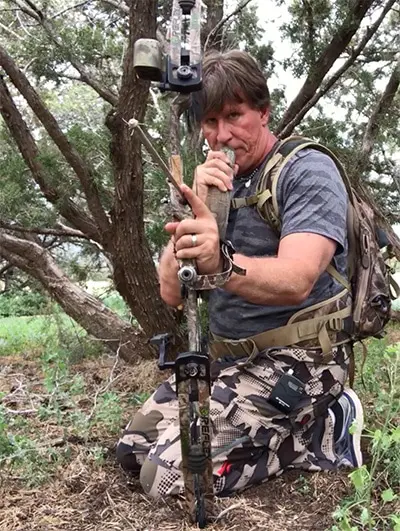 The stance or position you need to be in; standing, down on two knees, all the way down sitting on your heels… is mostly determined by the structure of the environment, the vegetation where you are hunting as well as what you are most comfortable with or physically able to do. Where we hunt in New Mexico, the pines that grow here usually get thick with branches about 4 to 5 feet up from the ground. So the best shooting lanes are lower where you can see below the tree branches. That’s why I personally prefer to physically setup down on my knees sitting on my heels with my bow already up, to the left side of (basically, the same line as if I were standing, to be able to draw and pull across my body) me in position with the bottom cam resting on the ground if its dry, or on my leg in wet or muddy conditions. I prefer a low profile, where it’s easier to break up my outline with most backdrops. It also allows me to rotate my body with my knees in a way that is hard for an incoming elk to detect.
It’s important to note that if I were hunting in Oregon, where the ground cover is thick as a jungle, there is no way I would be able to have clear shooting lanes setting up on my knees. The foliage dictates having to stand up to just get a shot. The most important thing to remember when getting into your shooting position for an approaching bull is to select the best position, whether standing or kneeling, to get the best shooting lanes.
The most important aspects of shooting position is clear shooting lanes as well as having the ability to make slight changes in position, if needed, without detection. There are two times that you will have to possibly change position;
1) If the elk is out of sight or still moving in at a distance and you know that a new position is critical in order to get a shot. In that case, you MUST move. If there is still plenty of a vegetation screen, just get there. Don’t worry about noise. The elk is expecting noise form the animals making the calls.
2) The elk is in tight, absolutely close and visual but moving to a side that requires you to rotate to be able to pull properly.
Once you get in position, always check or prepare your space for any possible failure points. Things that could interfere with your draw or give your position away if you move your feet or knees. Draw and rotate your body to make sure you are clear of any branches that could be in the way. If there are, either break them off or move out some. Again, I don’t worry about the noise when snapping branches. All natural to the elk and can even sell your setup better in some cases. If kneeling, clear debris around your knees and feet so you can move them without making noise.
This single question is most often the biggest dilemma for thousands of elk hunters year after year and the one act that HAS TO HAPPEN in order to kill an elk. Like ElkBros team member Gilbert Ornelas so eloquently states in just about every podcast… “YOU HAVE TO DRAW!”. And he is absolutely correct. No draw, no shot. No shot, no elk.
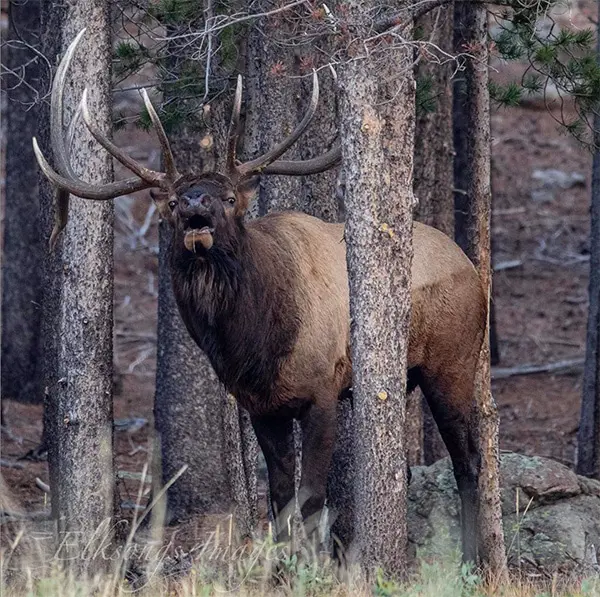 With that said, let’s simplify the situation and cut to the chase. I will talk about your best “Window” to draw here in a moment, but the best TIME to draw on an elk is WHEN IT IS MOVING. When an elk is moving, everything else around it is also moving. Just like if you are in a car on a country road with trees on both sides of the road. If you were to turn your head to look to the right or left side of the car, you would see trees flying by. That is an exaggerated example, but the very same concept as to what is happening to an elk as it moves through the trees. Your movement is harder to detect with the other movement going on. Does that mean that the elk will absolutely not see you draw if it is moving? Not necessarily. But if it does see you, the reaction from the animal is one that you can use against it. That’s where understanding your “Window to Draw” comes in.
There are a few variables that will determine your “Window to Draw”, the best time frame during the approach, and whether or not it has to be an aggressive move or one that happens before an elk even walks into your shooting lane; Time and Distance, Equipment, and how much cover or dips in the terrain there is between you and the elk.
Equipment: This probably raises the biggest question in your mind as to how it effects your Window to Draw. It’s pretty simple. With today’s bows having let-off of up to 80%, you have so many other options available simply because you can hold your draw SO MUCH longer. It allows that Window to draw to be much bigger or longer on an animals approach into your shooting lane. The lower the let-off, the more difficult that becomes and the less you can hold for any particular length of time.
Based on equipment alone, if you have a high percentage let-off, your best time to draw would be as soon as you see a horn, or part of the animal, or hear it very close and coming into your set-up. This allows you to be “at the ready” on a totally unaware animal walking into your sight window. But if you are like me, with a let-off at 60 to 65%, if you draw too soon and that animal takes it’s sweet time, you can find yourself in a tough situation and possibly having to let down and maybe even spook the elk when you do. So what do you do in that situation? Great question. And one to be answered after explaining the effects of each of the variables.
Time and Distance: As far as time goes, your window can quickly become defined for you by the amount of time you have to react to the situation. If an elk is right on top of you before you know it, well… you have both time and distance against you. An aggressive move is going to be your only choice. But if you have more time as the situation develops, you may have more choices available. The more distance between you generally equates more time, but the time will be relative to whether the animal is walking or occasionally feeding or if it is stopping every so many feet to scan the area in front of it.
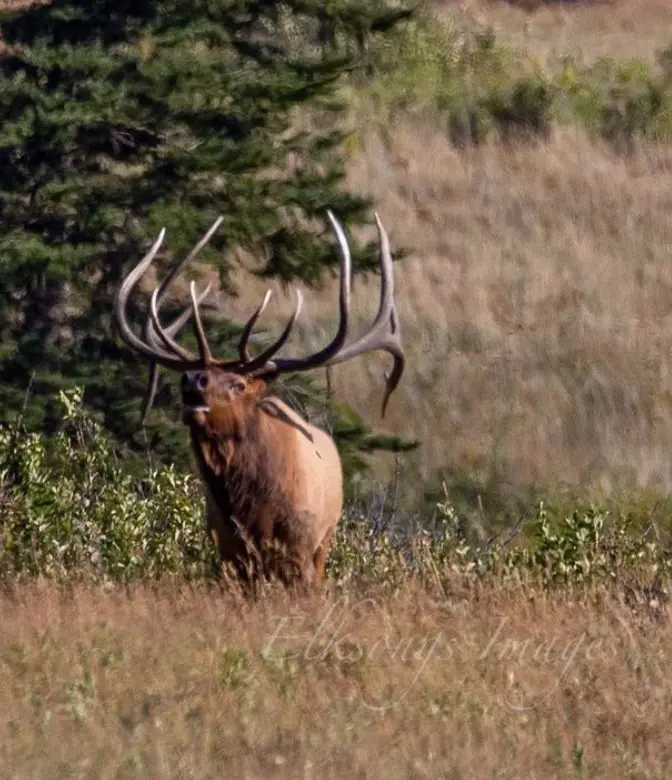 Cover or Terrain: This is probably the most important when it comes to determining your moment to draw. If the elk is moving through thick cover into your shooting lane, or if the terrain has dips that allow you to see horns or part of the animal before it sees you, you can generally draw back at any point before it pops up out into view or into the shooting lane. In this situation, make sure that you have your shooting lanes or sight window of opportunity identified and that you are drawn prior to the animal getting there, so that you can stop the elk in the shooting lane.
On the opposite side, if you have flat terrain and very little cover, you will again find yourself having to make an aggressive move which we explain below. But no worries y’all, trust me when I say it can be done if you avoid the mistakes below.
The two biggest mistakes made by elk hunters EVERY YEAR when there is sparse cover or open terrain or when an animal is on top of them so fast in thick cover is;
First: They don’t draw because they think they will scare the animal. Guys and Gals, understand this… if you don’t draw, the elk IS GOING TO WALK OFF anyway!
Second: They try to draw when the animal’s head & eyes are temporarily blocked by a tree. Nine times out of ten, what happens in this situation is the elk’s head will clear the other side of the tree in time to catch the last bit of movement of the drawing motion, immediately stopping and looking at you. Problem is, the head and neck are in the clear, but the tree that you were hoping would help you to get the shot is now covering the elk’s vitals. Now you are stuck trying to hold your draw in a stare down and it’s only a matter of time before you will have to let down. Result..most often… a blown opportunity.
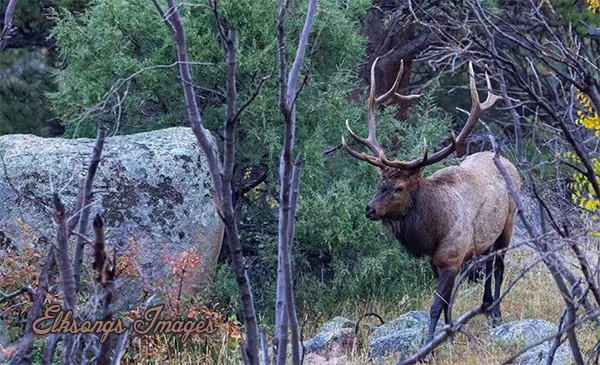 So what do you do if you have an elk in the open walking by, or in sparse trees or on top of you before you can draw?
Answer: Draw while the Bull is moving. Once he is broadside, in the clear and in your shooting lane, scream a bugle while simultaneously drawing. Make sure you are totally focused on your spot in the kill zone. Just as he would have done if he was clearing a tree, the bull is going to stop and look at you. That’s a dead bull! Even if he does booger for a moment, he will go about ten to 15 yards, and again stop broadside and look back to see what scared him. Again, done deal!
You have a bull moving through the trees and about to step into your shooting lane, but the window is only so big and he will be in and out of it before you know it. What do you do? Can you shoot a moving elk? If the animal is close enough and moving slow enough, sure. But just because you can, doesn’t mean you have to. Your goal is to take a shot at a stationary target and not a moving one. Less room for error and we do not take marginal shots. So again, what do you do? You stop him!
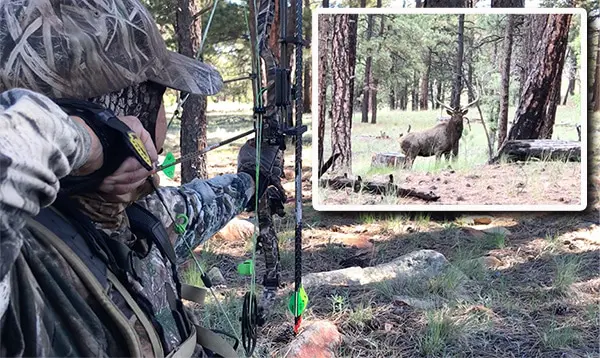
There are so many elk sounds that you can use to stop an elk, but depending on the situation I have basically three I prefer; I will either scream a bugle, grunt or give a cow call. Which one I use will depend on the situation or what led up to the encounter.
Example 1: You have been cow calling and you have a bull sneaking in looking to find the cow.
– You are at full draw prior to him hitting the lane. Because he is already in the mindset of looking for a cow, a little mew is going to stop him in his tracks. Point being, match what call you use to what got you into the situation. That’s where their focus is.
– His visibility coming in was too good and you are having to draw once he hits the lane. In this case you already know one thing…YOU HAVE TO DRAW. So the goal is to 1) Stop him 2) Get Drawn & 3) Confuse him for that brief second. So scream a bugle and draw at the same time. Focus ONLY on the kill zone and finish.
Example 2: You have been doing a rut scenario, sounding like a bull with a hot cow and you have a bull coming in fast. I mean he really is cutting the distance and is going to go by you into a large shooting lane.
– You saw the horns coming and were able to be at full draw prior to him hitting the lane. When a bull is on a mission like this and moving quickly, they are making a lot of noise and a cow call may stop him, but many times they don’t hear it and just keep on moving through. That’s why I want to make sure I stop him so I will either grunt or scream a bugle. A loud grunt is like a warning and will stop them in their tracks and a challenge scream has the same effect.
– He was on top of you before you knew it and so you still need to draw. Just as in the Example 1, you need to again stop and confuse him while drawing. When you scream a challenge bugle while drawing, the bull will stop and look at you and yes, he will see your movement. But the challenge scream will associate your movement with that of the bull that he is hearing. By the time he puts it all together. It’s too late.
It doesn’t matter the weapon, rifle or archery, the principle of shooting within yourself doesn’t change. Each and every one of us has to constantly evaluate and determine our capabilities and limitations when it comes to our use of our weapon and most importantly to commit to staying within those limits. It’s all about being honest and true to ourselves.
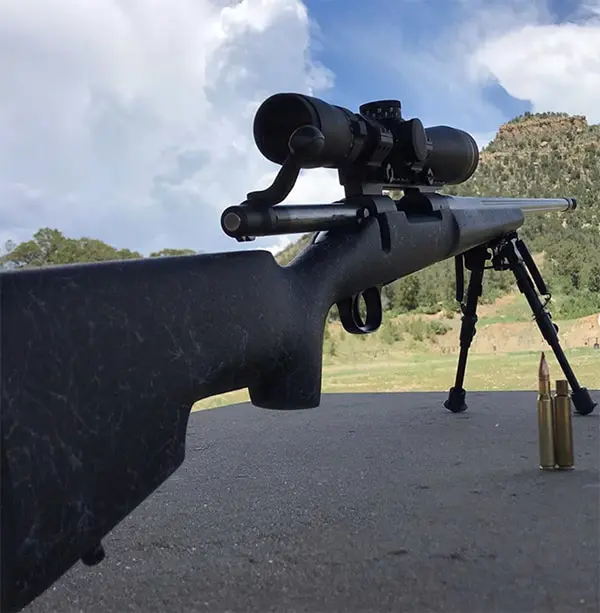 As a professional hunting guide, one of the first questions I ask my hunters is their comfortable range, what shooting position they are most comfortable? If they use shooting sticks or a bipod, I want to know if they practice while using them? From there, I also verify their answers concerning their abilities at the shooting range while also having them shoot beyond their range and from multiple shooting positions. My goal, as should be your goal, is to again fully understanding their capabilities and to have a gauge of their limits and how well they truly know their weapon and how it shoots.
For me as a guide and for you as the hunter, it is imperative as an ethical hunter to stay within your realm of confidence, effectiveness and ability level. Even though a rifle hunter’s comfort zone is measured in hundreds of yards and a certain distance might only be 20, 30 or 50 yards more, it’s the mental aspect that drives success. If I have a hunter that mentally believes that she or he is only solid and effective to a certain distance, I would absolutely respect their decision to pull up rather than risking a marginal shot and wounding an animal.
Only you know your limits and whether you are DIY or being guided, ultimately that decision of whether to pull the trigger or not, is totally on you. Stay within yourself and if you are uncomfortable, that’s a red flag and it is totally your call to pull the trigger or to pull up and wait for a better opportunity. An opportunity that will end with the celebration of a good clean kill and not end in regret.
Our first and foremost responsibility when we take a weapon into the woods is to know, understand and be safe with our weapon. The purpose of this Training Camp is not to teach gun safety. There are experts and plenty of training out there for that. But there are specific points, as your coaches that we want to ’emphasize’ to insure your experience doesn’t become a nightmare for you or anyone else with or around you.
ELKBROS POINTS OF EMPHASIS:
Muzzle Control – There is one thing that I believe to be true… If you use a firearm long enough, whether hunting, target practice, as part of your job or competitively, at some point you are going to have a weapon unintentionally go off when you least expect it. It happens and for so many reasons other than operator error. The point being, crap happens and when you least expect it. That’s why “Muzzle Control” becomes the most important safety tool in your box. If you are ALWAYS aware of where your weapon’s muzzle is pointed AND you ALWAYS insure that it’s never aimed at yourself or others around you, you are preventing a possible disaster.
As a guide, hunting with those that I have never hunted with, I demand muzzle control from my hunters. If they do not maintain safe muzzle control, our hunt is over. I will not take chances with my life and where a simple sorry might cut it the first time, it becomes non-negotiable the second time. It’s not that I am angry, or trying to be a butt, it is simply a matter of life or death. It is ABSOLUTELY a matter of life or death. If someone is not responsible enough to understand and practice that, then they will have to find another guide or in some cases, another hunting partner.
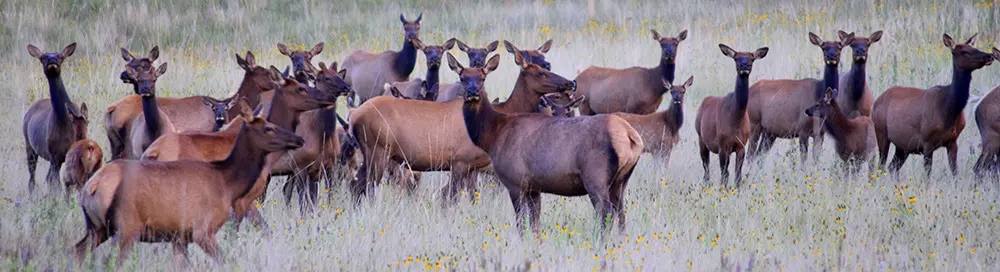
Target Certainty – You must be absolutely sure of your target. To take a shot at a sound or movement is totally irresponsible, completely unethical and a quick recipe for disaster. Your finger should never be on the trigger unless you are ready to shoot. Identify your target, backdrop confirmed, verify the animal is clear of other animals, kill shot sighted, safety off, finger on trigger, shot locked in, exhale and squeeze like shaking a hand and let the gun surprise you.
Backdrop – One of the benefits of shooting from an elevated position, whether a treestand or a ridge-top, is you absolutely know you have a solid backdrop, the area behind where your bullet will impact. On the opposite end of the spectrum is if you have an elk skylined on the top of a ridge or hilltop. That is totally a “NO-GO” situation. A high velocity bullet will travel over three miles if unimpeded and you have no idea what could possibly be in that line of fire. Always check the back drop and KNOW that your shot has no chance of injuring a person or another animal beyond your intended target.
There is no magic wand y’all when it comes to shooting confidence. Confidence is results driven. The more you practice correctly, the better you get. The better you get, the more confident you become… in anything in life. You must put the time in, it’s plain and simple.
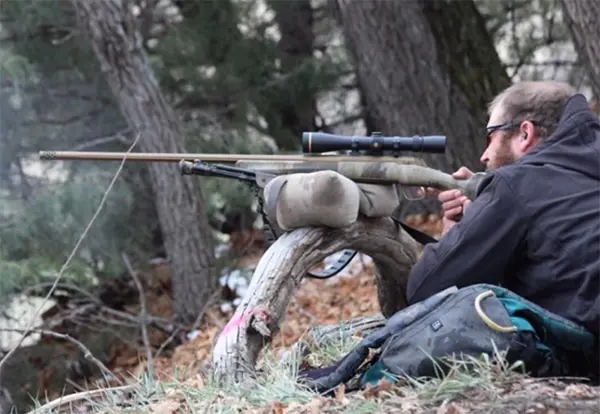 The confidence that comes from shooting off a bench at the range can quickly be blown when having to shoot from sticks for the first time, a new bipod, on top of a pack or resting on a branch. Add to that, thick clothing and freezing temps and you have a formula that can take you out of your comfort zone really quick. It is SO important for you to practice and prepare for the very situations that will be presented to you in the field. The whole idea of this course is for you to understand what success looks like. To be able to perform well because you know what to expect. You have been there. You have practiced each and every part of your “end game”. So my friends, get out of your comfort zone at the range. Wear what you will be hunting in. Shoot from various positions , in tough conditions and from multiple rests. Risk your perfect range results to be proficient, consistent and confident in the field. That is where it’s truly going to count.
Because of the power, speed, impact and accuracy of today’s higher calibers, the rifle hunter’s shot selection for a quick and clean kill grows in comparison to the bowhunter. The key to what is marginal and what is not marginal has a direct relationship to the hunter’s knowledge of an elk’s anatomy. Knowledge, experience and confidence can give a rifle hunter more optimum shot options. Whereas the lack thereof will limit those opportunities.
This is one of those personal decisions that only you can make concerning your knowledge base and confidence. Whenever I have a first time elk hunter, any shot other than a broadside or quartering away shot (knowing to aim at the opposite leg) becomes a “NO-GO” situation. Which is totally fine. It’s all about staying within your wheelhouse and knowing that your shot will result in a quick and clean kill.
We also coach that an extreme quartering away, where there is any chance of hitting the animal in the hind quarter, is a marginal shot. And we never shoot an animal in the back-end. No Texas heart shots in this camp! In these situations, remember that patience will equate in a better opportunity. If the bull is moving away, let out a cow call and get him to turn. Now it’s game over.